
A bass drum head decal can be applied in about 10 minutes, and a stage-ready installation works best in a stable 50–90°F environment. It lets a band put its logo on an existing rental head for a gig, then remove the graphic afterward instead of replacing the head.
The blank rented backline is waiting under the stage lights. The drum kit is functional, the microphone is already positioned, and soundcheck is approaching, but the front bass drum head carries no trace of the band behind it. A carefully packed decal can turn that anonymous kit into a recognizable stage asset before the first song.
The Touring Band’s Logo Dilemma
A touring band can have a strong visual identity on its posters, shirts, social profiles, and banners, then lose that identity the moment a venue supplies a borrowed kit. The front head becomes a blank circle in the most visible position on stage. From the audience, the logo disappears even though the band’s sound and performance remain unmistakable.
Swapping a resonant head onto every rented kit sounds simple until the practical work begins. Someone has to carry the head without damaging it, remove hardware carefully, align the replacement, and pack the original head safely for the return journey. Tight changeovers make that process especially risky because a delayed setup can push back microphone placement or soundcheck.

A visible identity without another head
A bass drum head decal for band logo at a gig is designed to apply to an existing head without replacing it. That keeps costs low for high-frequency gigging bands and reduces the amount of equipment travelling between venues. A removable graphic can go on for the performance and come off after the show, leaving the supplied head available for the next act.
The approach also fits the history of stage branding. The Beatles’ bass-drum logo was first painted in 1963 and later updated for their appearance on The Ed Sullivan Show on February 9, 1964, while industry histories place the wider adoption of front-head logos around 1962. The bass drum became more than a percussion surface. It became a visible identity marker for a live act, a role that remains useful when the kit belongs to someone else. The Grammy Museum’s history of memorable drum logos provides context for that shift.
Practical rule: If the band regularly uses backline, the fastest branding solution is usually the one that travels flat, installs without hardware work, and leaves the rented kit unchanged.
A decal doesn’t replace a full custom head for every situation, but it bridges the gap between a completely blank backline and the expense of carrying a dedicated front head to every stop. The band gets a consistent visual marker without building every show around a drum-head swap.
Decal vs Custom Printed Head
The choice depends on what the band owns, how often the kit changes, and whether the artwork needs to stay in place for the long term. A decal is a graphic layer applied to an existing head. A custom printed head is a complete resonant head manufactured with the artwork already on its surface.
That distinction creates a straightforward decision matrix:
| Touring situation | More practical choice | Why |
|---|---|---|
| Different rented or borrowed kits | Removable decal | The existing head stays in place |
| Frequent one-night gigs | Decal | The band carries a light branding layer instead of another head |
| One owned kit used repeatedly | Full custom printed head | The design remains installed and ready |
| Permanent visual identity | Printed head | There is no repeated application workflow |
| Branding that changes between projects | Removable decal | The graphic can be changed without replacing the head |
A decal is the more flexible choice when a band moves between bass drum diameters or backline packages, provided the selected graphic fits the available head. It also avoids committing the band to one permanent design. That matters for acts that use one logo for a tour, a different graphic for a special event, or separate branding for teaching, worship, and performance work.
A full custom printed head makes more sense when the same drum remains with the band and the logo should always be ready. There is no film to position at load-in, and direct printing avoids the bubbles and lifting edges associated with an applied layer. Material history helps explain why printed graphics became practical. Plastic drumhead development began with Chick Evans in 1956, followed by a Mylar polymer head developed by Remo Belli and Sam Muchnick in 1957, making consistent graphic surfaces more feasible for touring, recording, and marching use. This history of graphic bass drum heads outlines that progression.
Permanent applications deserve more caution during removal. Removable decals can be peeled away without residue when used correctly, while a permanent decal can damage the head during removal. The right decision isn’t just the lowest upfront cost. It is the option that matches the number of changeovers, the amount of handling, and the expected life of the artwork. A useful guide to custom printed bass drum heads can help a band assess the complete-head route before ordering.
Choosing Stage-Ready Decals
Stage visibility starts with the relationship between the artwork and the actual drum diameter. A logo that looks balanced on a laptop preview can become too small once the full kit is several feet away, especially in a dark club where the audience sees the drum through haze, colored lighting, and movement.
Start with the head measurement, not the decal artwork. Custom bass drum head sizes commonly run from 16 to 32 inches, and the printable area changes with the shell, so the exact diameter should be confirmed before the design is built. This guide to sizing a decal for 20, 22, and 24 inch kick drums explains why the physical head size matters to the final composition.
Build for the audience’s sightline
A stage-ready logo should have enough visual weight to survive distance. Fine lettering, narrow outlines, and low-contrast color combinations often disappear before the main symbol does. A simplified mark with a clear silhouette usually reads faster than a detailed illustration squeezed into a small circle.
Use the live mockup to check three things:
- Scale: Make the logo large enough to register from the back of the room while leaving a deliberate margin around the head.
- Contrast: Pair dark artwork with a light head, or use a light logo where the background and stage lighting demand it.
- Position: Keep the main mark clear of the mic-port area and any hardware that may interrupt the visual shape.
Custom decals can be printed with any logo or artwork in full color, so a band isn’t restricted to a single-color wordmark. A full-color emblem, illustrated character, photographic texture, or layered tour graphic can work if the file retains enough detail at the final size.
Artwork should be created at the exact final print size and prepared at 300 DPI at that size. Scanning source artwork at 600 DPI before editing and exporting at a minimum of 300 DPI can preserve detail in logos, photographs, and fine line work. This artwork preparation guide covers that production step.
Choose the surface with the decal in mind
Smooth or gloss heads provide the most reliable substrate for an applied graphic. Textured or heavily coated surfaces can reduce contact and make edge lift more likely. A gloss finish can also give saturated colors more visual impact, while a matte-looking surface may reduce reflections under direct lighting. The finish should support both adhesion and the band’s visual language, not just the logo file.
Installation for Lasting Durability
A decal can look professional through a full set, but only if the installation begins with a clean, dry head. Dust, skin oils, wax, silicone, and cleaning residue create a weak boundary between the vinyl and the surface. Rushing this stage is the most common reason a graphic begins to lift before the band reaches the encore.
Prepare before peeling the backing
Wash the existing head with mild soap and water, then dry it completely. Follow with 70% or stronger isopropyl alcohol on a clean, lint-free cloth to remove remaining oils and residue. The head should feel dry and smooth before the decal leaves its backing.
Installation guidance recommends working above 55°F, with a typical stable range of 50–90°F, because pressure-sensitive vinyl bonds more reliably when the surface and adhesive aren’t cold. This decal application and removal guide gives the full preparation sequence and explains why temperature and contamination affect the bond.
Align first, commit slowly
Hold the decal against the head before exposing the adhesive. Check the logo from several feet away, ideally from the same angle the audience will have, and confirm that the visual center works with the drum’s position and microphone. A mark that appears centered from directly in front can look high or low once the kit is on a riser.
Apply from the center outward or from one controlled edge. Press gradually rather than dropping the entire graphic onto the head at once. A small squeegee, wrapped card, or similar smooth tool can push air toward the edges while protecting the printed surface.
A clean head and a slow first pass matter more than a fast application. Most visible failures begin before the decal is fully attached.
Work across the graphic with firm, overlapping strokes. If a bubble appears during application, lift the affected area carefully rather than stretching the vinyl or grinding the air pocket deeper into the adhesive. Once the decal is down, press the perimeter again and allow it to dry fully before the drum is played.
Die-cut decals are described as waterproof after application, with vinyl that can withstand heat, sweat, and humidity. Removable versions are more vulnerable when moisture reaches the edges, so the band should avoid applying them to a damp head or playing immediately after a wet installation. Commercial-grade vinyl can remain serviceable for years, but handling, surface smoothness, and repeated removal still determine how long the graphic performs reliably. Application and durability guidance for bass drum decals covers these practical limitations.
Touring Logistics and Transport
A decal should be treated as stage equipment before it reaches the stage. Folding it into a pocket, leaving it loose beneath cables, or allowing cases to press against the adhesive side can turn a clean logo into a creased graphic with damaged edges.
A touring band benefits from a dedicated flat sleeve or rigid folder inside the branding kit. The decal should remain on its original backing, face protected, and stored where drum hardware, cymbals, and power supplies cannot bend it. A gig bag pocket works only if the pocket keeps the graphic flat and isn’t routinely crushed during load-in.
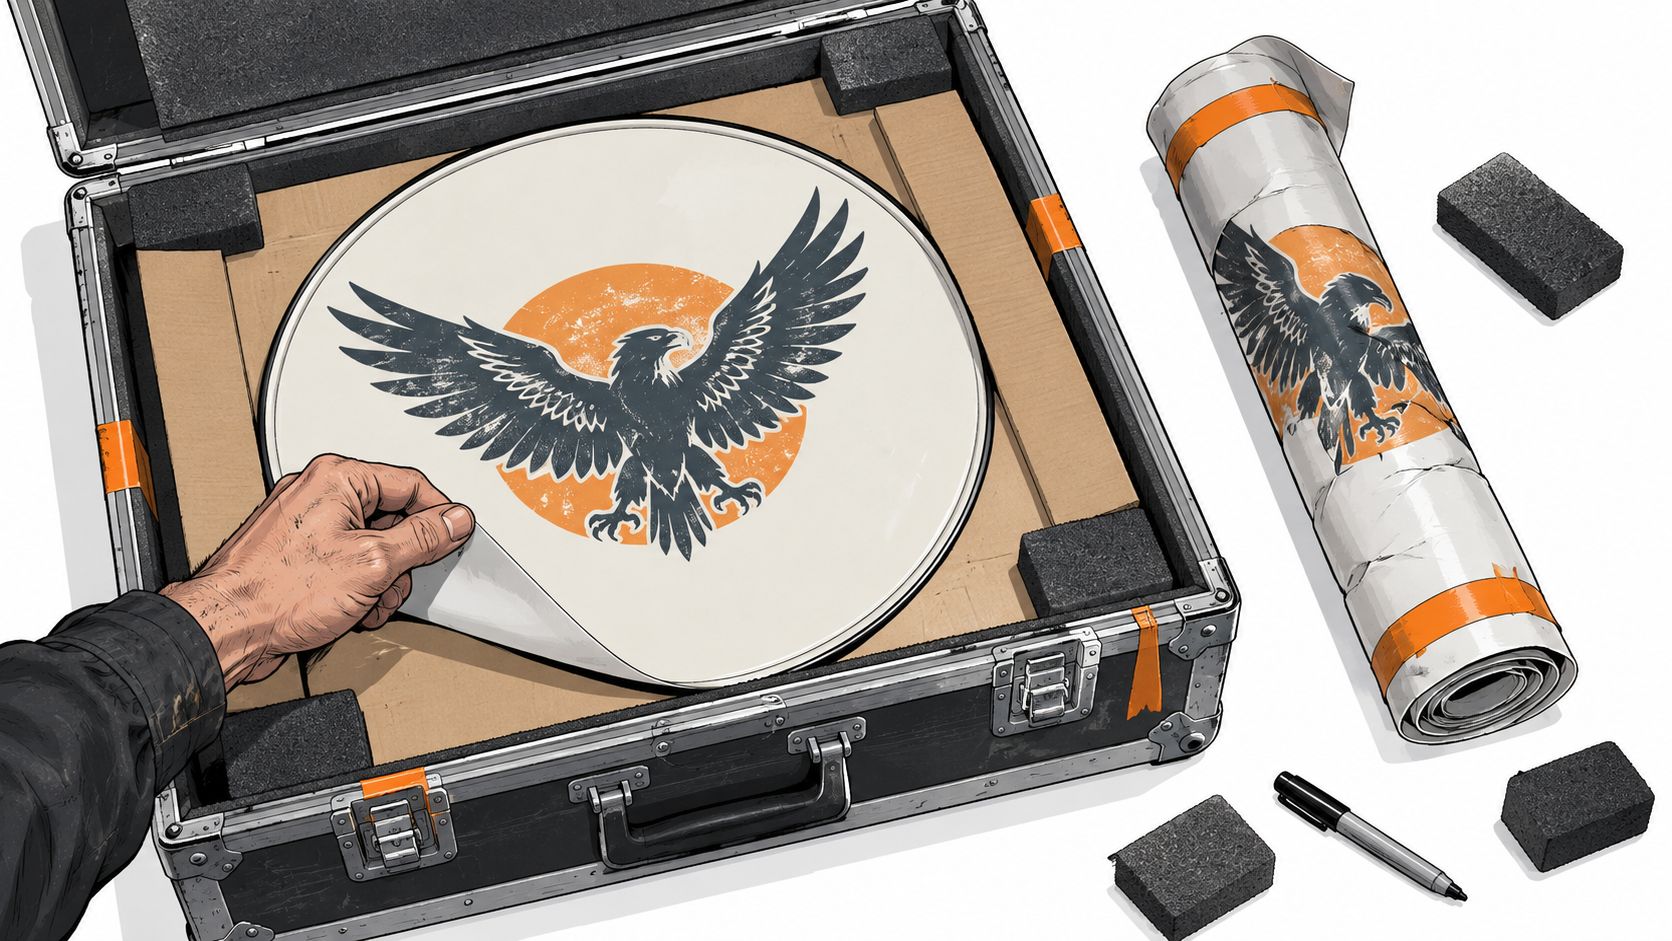
Build the decal into the changeover
The fastest workflow places the branding kit with the items used during front-head preparation, not at the bottom of a suitcase. A designated pouch can hold the decal, a lint-free cloth, alcohol wipes, a small squeegee, and a protective sleeve. That keeps the person handling the logo from searching through the drum cases while the stage crew is building the backline.
Before leaving the previous venue, the band should remove the graphic carefully, inspect the edges, and return it to the backing. The adhesive face shouldn’t be exposed to dust, tape fragments, or fabric fibers. A quick visual check after removal can identify a crease or lifted corner before the next show.
Temperature swings inside vans and trucks also deserve attention. Excessive heat can make the adhesive softer and more vulnerable to distortion, while cold storage can reduce immediate bonding performance. The decal should reach a stable working temperature before application, and it shouldn’t be left pressed beneath heavy equipment.
Transport rule: Keep the decal flat, clean, and easy to reach. A graphic that survives the road but can’t be found during a fast changeover isn’t solving the logistical problem.
The band should also plan around lead time and delivery conditions rather than assuming a last-minute replacement will arrive before a show. Shipping options, destination details, and protective handling requirements are outlined on the bass drum head shipping information page. For a recurring run of dates, carrying a spare decal can be sensible, but only if the spare receives the same flat storage and temperature protection as the primary graphic.
Troubleshooting Common Issues
A bubble, curled corner, or stubborn section usually points to a specific installation problem. The solution is to identify the cause before pressing harder.
- Trapped bubbles: Lift the affected area carefully from the nearest edge, then reapply while pushing air outward with a wrapped card. Small bubbles should not be pierced casually, because a hole can become a visible flaw in the logo.
- Edge lift: Check for moisture, oil, dust, or a textured coating beneath the edge. Clean and dry the exposed area, then press the vinyl down again. If the edge has collected dirt or has permanently stretched, replacing the decal is safer than forcing it to hold.
- Poor adhesion: A coated or textured head may not provide enough smooth contact. A smooth or gloss head is the more dependable substrate for stage graphics.
- Misalignment: Don’t pull the entire graphic off at once. Lift slowly, realign from the backing side, and restart with a controlled center or edge application.
- Moisture under the film: Wet application can help reposition a decal, but trapped moisture at the edges can weaken the bond. Let the surface dry fully before the performance.
A decal that starts peeling during soundcheck shouldn’t be ignored. The edge will catch more air and movement once the drum vibrates, so fixing it before the set is easier than trying to repair it between songs. If the head is unsuitable or the graphic has been repeatedly handled, a direct custom printed head may be the more dependable long-term solution.
Designing Your Next Look
The most useful branding decision is the one that matches the band’s actual travel routine. A removable decal suits a high-frequency act that changes backline, needs low carrying weight, and wants to apply its identity without replacing the existing head. A full custom printed head suits an owned kit that stays with the band and should be ready without a setup step.
The design still has to work as a stage object, not just as a digital file. The logo needs enough contrast to survive colored lights, enough scale to read from the audience, and enough resolution to preserve fine details. A mic port also needs deliberate placement because standard port sizes include 4, 5, and 6 inches, with 4 inches commonly used for printed graphics while larger ports provide more room for microphone positioning. These pro band logo bass drum head design tips address composition choices that affect the finished front head.
For a touring band, the strongest workflow is often a two-part system. Use a removable full-color decal for borrowed kits and changing routes, then invest in a printed head when one owned kit becomes the visual home base. Both options keep the bass drum working as a clear point of recognition, but they solve different problems around transport, permanence, and setup time.
Custom Bass Drum Head offers custom-printed bass drum heads and decals made from uploaded logos, artwork, and full-color band graphics, with sizing and placement designed around the kit. Visit Custom Bass Drum Head to prepare the decal for the next backline gig or create a permanent printed head for the band’s own kit.