
You’re standing in front of a wall of drum heads with a new tour graphic open on a laptop. The logo looks sharp on screen, but the head still has to survive aggressive playing, stage lights, mic hardware, and repeated setup. For a metal drummer, the purchase isn’t only about finding the best drum heads for metal. It’s about choosing a surface that delivers the right attack and gives artwork a durable, readable place to live.
The right specification depends on where the graphic will sit, how much impact the head will take, whether the bass drum needs a port hole, and how much overtone control the kit already has. A custom resonant head usually offers the safest visual real estate, while a custom batter head demands more careful choices around construction, ink adhesion, and artwork placement.
What a Metal Player Really Needs from a Drum Head
A metal kit asks every head to perform two jobs. It must withstand rapid, forceful playing, and it must present the band’s identity clearly from the audience side. Those demands overlap, but they aren’t identical. A head that sounds aggressive may not provide the cleanest surface for detailed artwork, while a visually perfect design can fail if the construction is too delicate for the player’s attack.
The working requirements are straightforward:
- Cut and attack: The kick and snare need enough definition to remain audible over double-kick passages, dense guitars, and palm-muted rhythm parts.
- Durability: The film must tolerate heavy striking, repeated tuning, and the wear created by regular transport and setup.
- Response under damping: The head should remain usable when the drummer adds gel, internal fabric, or other muffling to control ring.
- A dependable print surface: Batter-side artwork needs a surface built for impact, while a resonant-side logo needs clarity, contrast, and clean port-hole planning.
Synthetic drum heads made from Mylar and polyester changed the practical limits of modern drumming. Early drums used animal skins for thousands of years, but plastic head development arrived in the 1950s, with a plastic prototype credited to Chick Evans in 1956 and Remo’s Mylar development commonly dated to 1957. The change brought greater consistency and weather resistance, two qualities that matter when loud playing and changing venues put constant stress on the instrument. Remo’s drumhead history provides the historical background.
Practical rule: For a custom metal bass drum head, sound, impact resistance, and artwork placement have to be specified together. Choosing the film first and adding the graphic afterward is how avoidable problems start.
A resonant head is generally the easier place for a full logo or album image because it doesn’t receive direct beater impact. A batter head can still carry artwork, but the design should use stronger shapes, larger lettering, and a print process suited to repeated contact. The rest of the decision comes down to ply construction, film thickness, coating, port placement, and the visual hierarchy that keeps the design readable from the back of a room.
Ply Count, Film Thickness, and Coating Explained
Ply count means the number of film layers laminated together. Think of each layer as another piece of armor. More layers usually bring greater resistance to dents and a more controlled tone, but they can also make the head feel less immediate and less open.
Film thickness changes how the head responds under the same stroke. A thinner film reacts quickly and produces a lively attack. A thicker film absorbs more energy, tends to feel more substantial, and offers a stronger barrier against wear. Mylar drum applications commonly use 3.0, 5.0, 7.0, or 10.0 mil film options, and the choice affects both durability and playing feel. This Mylar material guide outlines those thickness categories.
Coating adds another variable. A clear, uncoated film generally delivers a brighter attack and more exposed ring. A textured or matte surface can soften the top end, reduce uncontrolled overtones, and provide a different tactile response. For a printed bass drum head, coating also changes how colors, fine lines, and contrast appear under stage lighting.
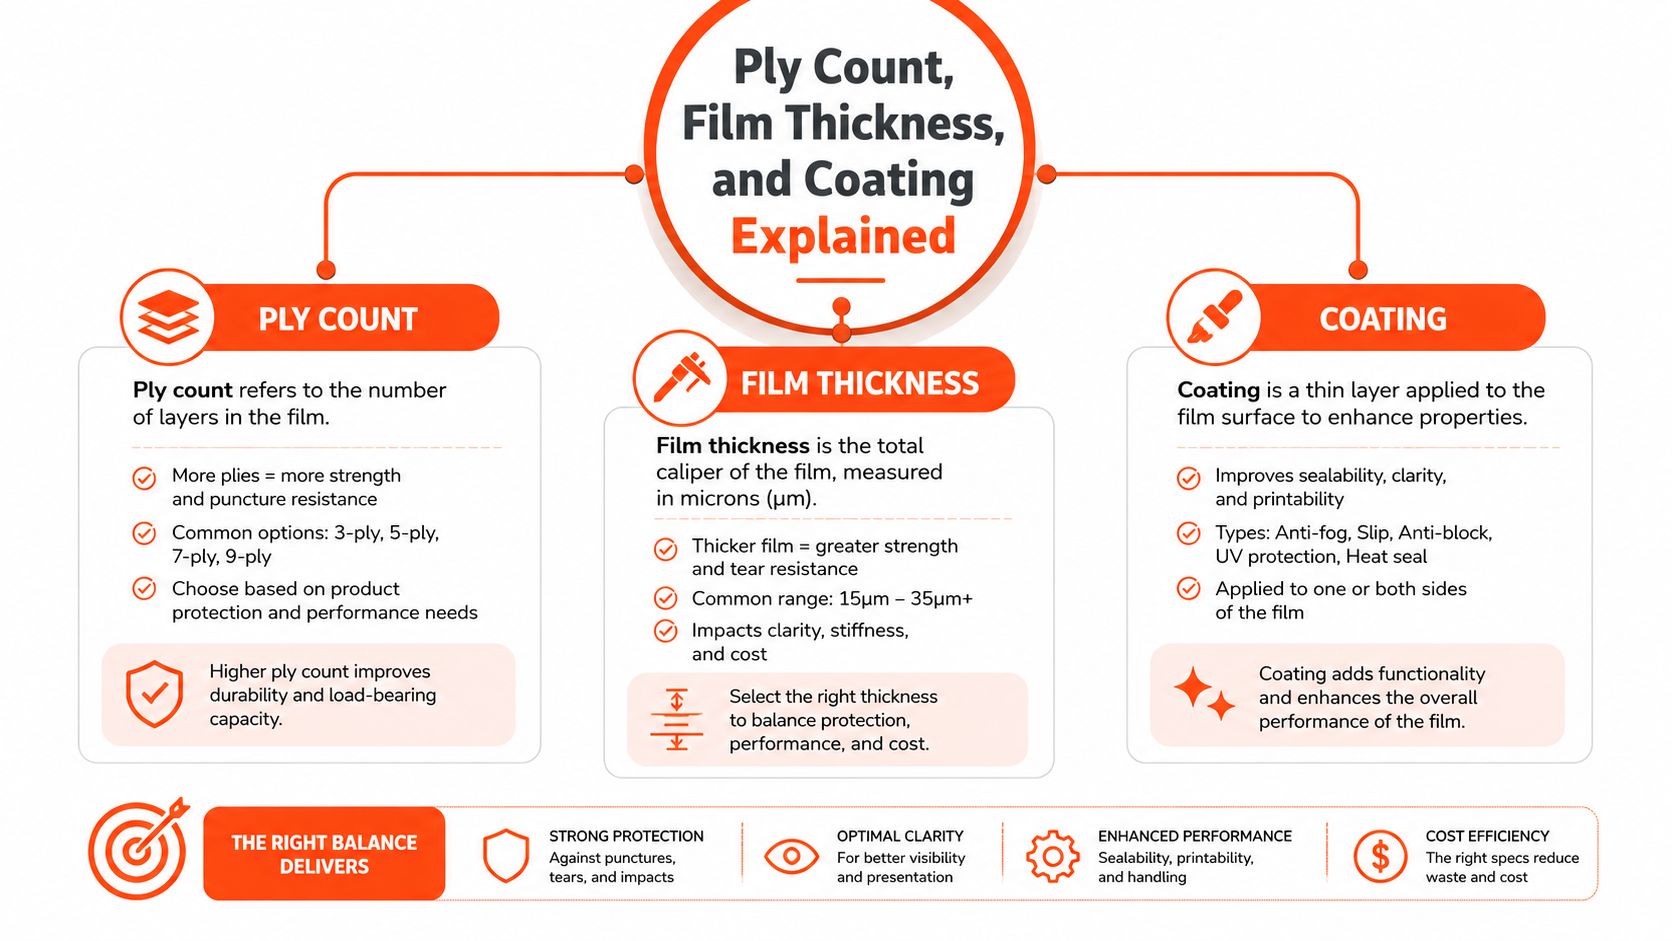
What each specification changes
- Single film: Fast response and clear detail, but less forgiveness under repeated heavy impact.
- Two films: More strength, a darker response, and better control of upper overtones.
- Thicker film: More resistance to denting and a firmer feel, with less instant rebound.
- Coated film: A more controlled visual and sonic surface, though textured material can soften tiny artwork details.
- Built-in control: Internal dots, rings, or damping areas can keep a metal part focused without relying entirely on external muffling.
Metal players often want faster decay because long, uncontrolled sustain can blur the spaces between kicks and guitars. That doesn’t mean every head should be as dead as possible. Excessive damping can remove the energy that makes a custom graphic and a live kit feel powerful. A useful material comparison appears in this guide to drum head constructions, but the purchasing decision should remain focused on the intended playing role and print surface.
Single-Ply vs Two-Ply vs Double-Ply for Metal
There’s no universal winner. The right construction depends on whether the artwork sits on a front resonant head, whether the batter side receives direct impact, and how much control the shell and tuning already provide.
| Construction | Attack | Durability | Tone Character | Print Compatibility |
|---|---|---|---|---|
| Single-ply, 10-mil | Fast and bright | Good, but more vulnerable to dents | Open and lively | Excellent detail on an even surface |
| Two-ply, often 7-mil plus 7-mil | Focused with useful cut | Strong metal workhorse | Slightly warmer and shorter | Strong compatibility for bold and detailed artwork |
| Double-ply, often 10-mil plus 10-mil | Thick and controlled | Highest resistance to heavy hits | Dark, focused, and potentially choked | Durable surface, but fine lines can lose clarity |
A single-ply 10-mil head responds quickly and gives the beater a bright edge. That can suit a player who wants maximum articulation and a clean, crisp graphic. The trade-off is physical. Heavy hitters can dent the film, and direct batter-side artwork faces the same impact that eventually changes the head’s response.
A two-ply head, often built from 7-mil plus 7-mil layers, is the practical middle ground. The added mass supports heavier playing, reduces excessive high-frequency ring, and still leaves enough response for fast passages. Two-ply construction also gives a custom print a more stable foundation, especially when the artwork uses large blocks, sharp lettering, or a dark full-bleed background.
A double-ply 10-mil plus 10-mil head is for players who value brute-force durability over openness. It can handle severe impact, but dense external muffling may push the head toward a flat, choked response. Its thicker surface can also soften the edges of very fine print lines.
For a batter-side graphic, two-ply is the clearest recommendation for most metal applications. For a front logo or album image, a single-ply resonant head can preserve visual detail and provide the open response needed for microphone work. A double-ply option makes sense when touring abuse matters more than subtle tone or miniature artwork.
How a Custom Printed Head Affects Tone and Durability
A blank head and a printed head with the same film specification aren’t exactly the same instrument. Printing places ink onto the film, and a primer or protective clear layer may be used depending on the production method. That printed surface adds material, stiffness, and mass, so the head can respond with a slightly tighter attack and less sustain than an otherwise identical blank head.
The audible difference is usually more noticeable on a thin, open head than on a heavier two-ply construction. A thicker film already controls some of the head’s movement, so the print layer has less influence on the overall character. That makes a two-ply batter head a sensible choice when full-bleed artwork and hard playing have equal priority.
The printing method also matters. Direct printing lays the graphic onto the drum film rather than attaching a separate sticker or overlay. A suitable production workflow can use UV-cured or solvent-based inks, followed by sealing where appropriate. The important questions for a metal buyer are whether the ink adheres to the selected surface, whether the finish flexes with the film, and whether the edge remains protected near the hoop.
Tour failures usually begin at the edges
The strike zone gets attention, but the rim area often reveals poor preparation first. Common failure points include:
- Flaking near the impact area: Thin outlines or weak adhesion can deteriorate where the head flexes repeatedly.
- Curling near the hoop: Excessive sealing or an overly heavy edge treatment can interfere with seating.
- Muffling graphics placed too close to the rim: Printed rings and border effects may not align with the head’s actual seating area.
- Fine detail on a heavily textured face: Small lettering and narrow lines can lose definition before the main graphic looks worn.
The print should follow the head’s behavior, not fight it.
A direct-printed head is therefore a material choice, not merely a decoration. This comparison of screen printing and direct printing helps frame the production decision, but metal players should judge the result by impact location, film construction, and expected transport. For a resonant head, durability concerns shift toward stands, microphones, cases, and repeated setup rather than beater strikes.
Designing Artwork That Survives the Gig
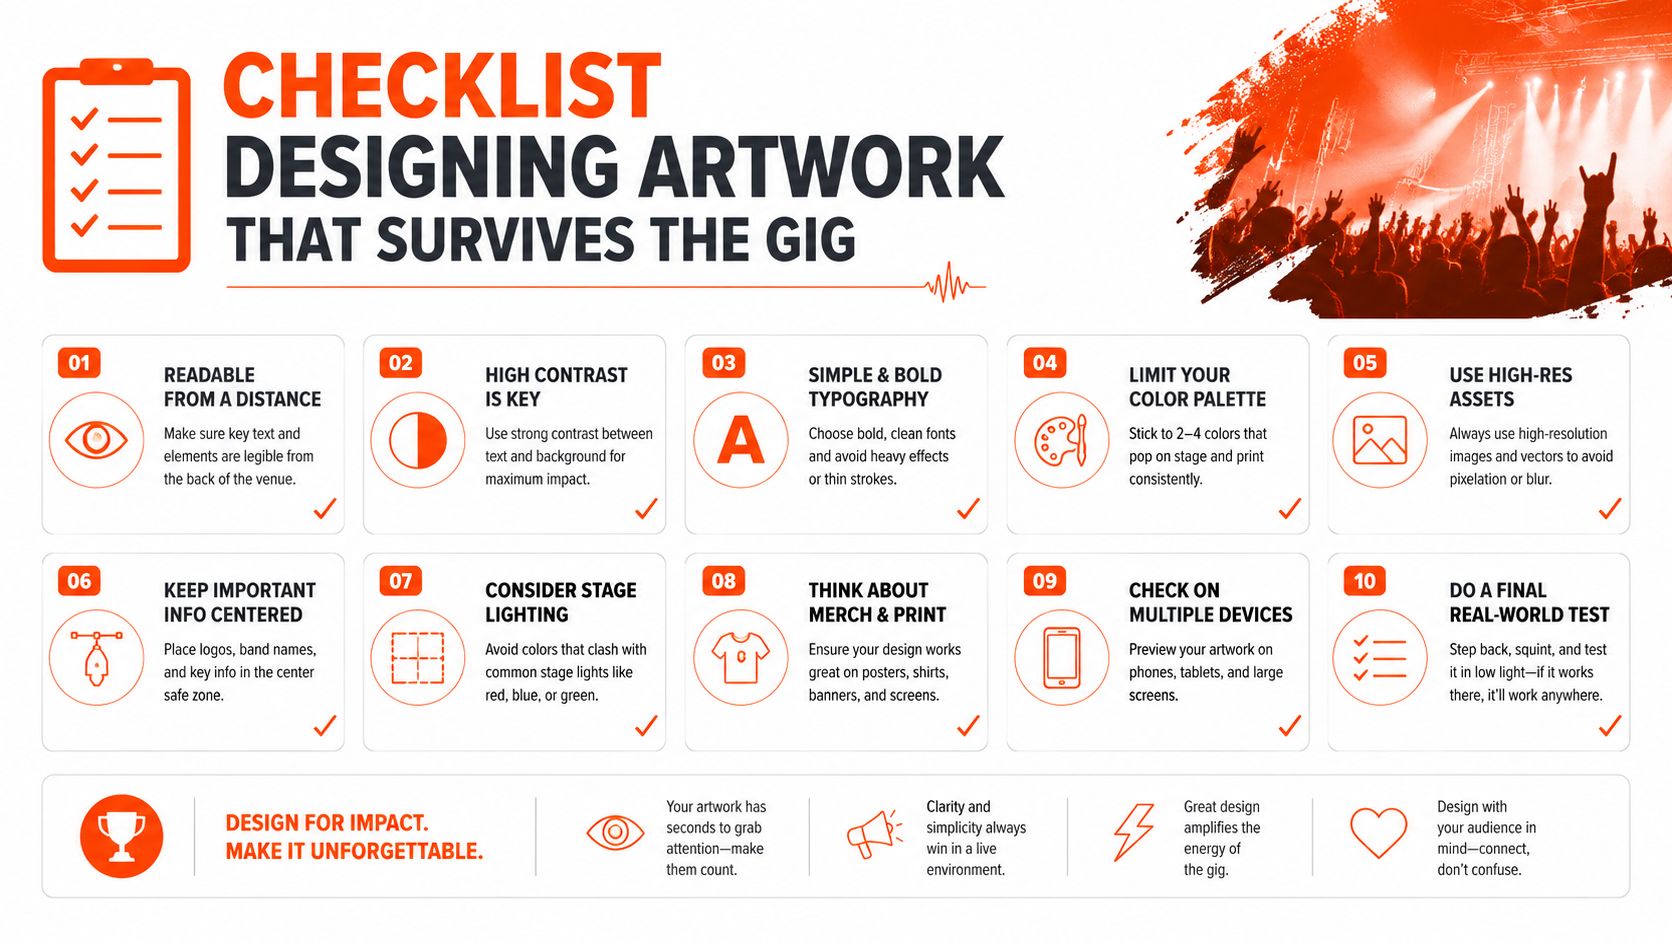
Artwork fails on stage for practical reasons. The logo is too thin, the main text sits behind hardware, the port hole cuts through a face, or the colors lose contrast under blue and red lighting. A metal bass drum head needs a design that reads quickly and remains structurally simple at performance distance.
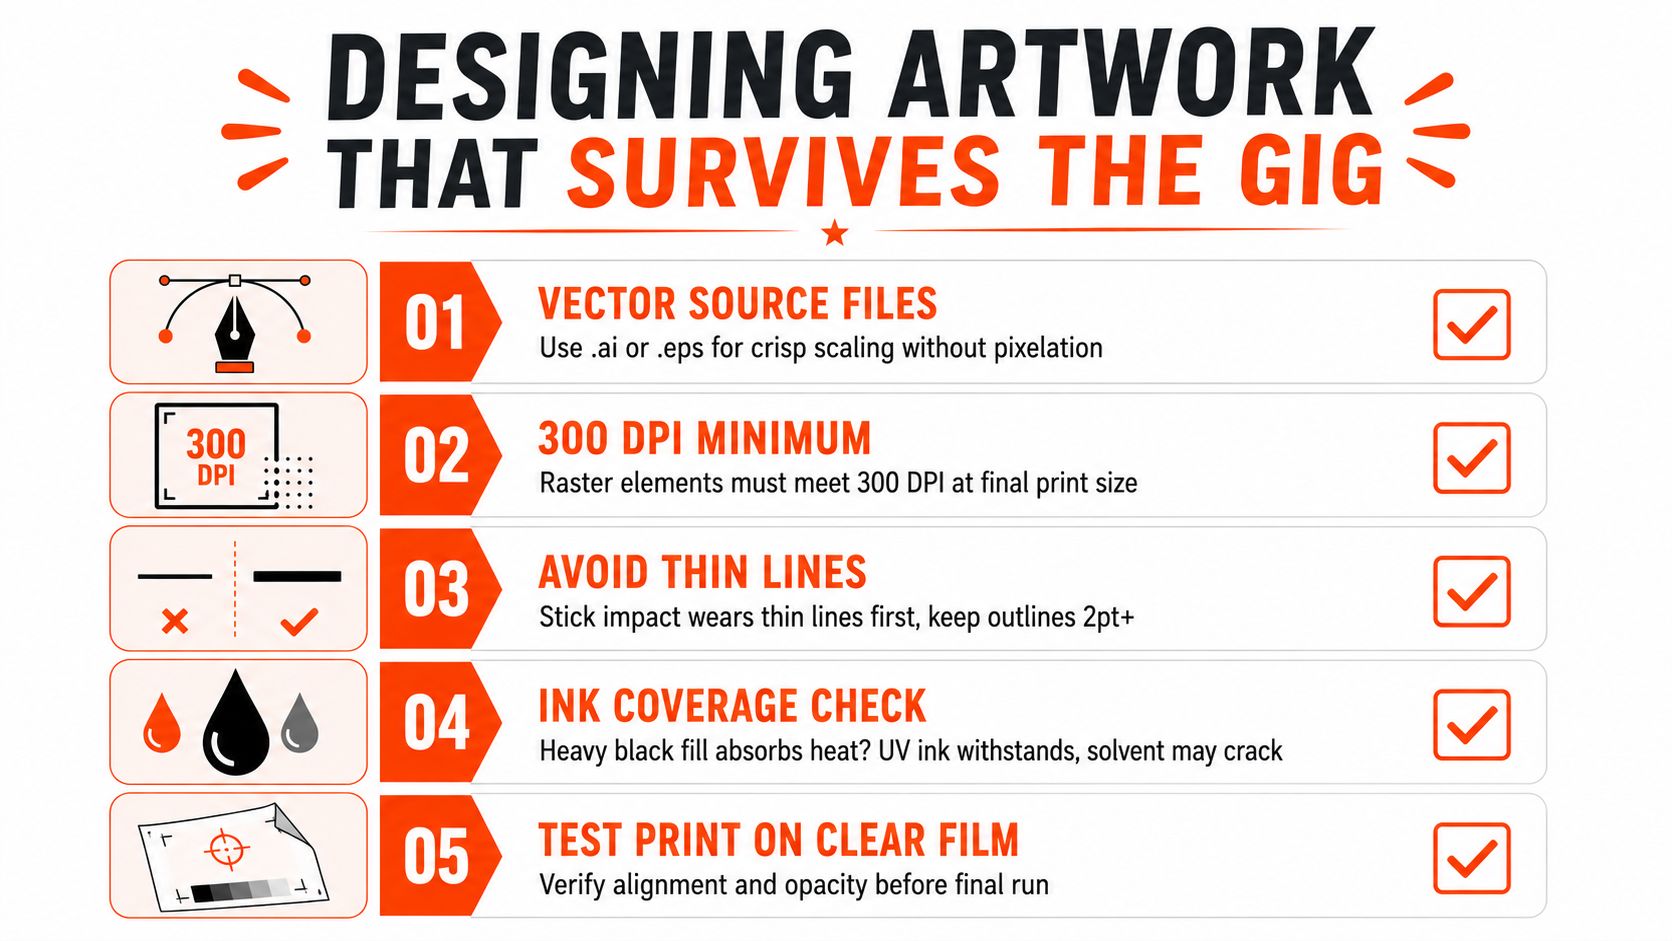
Start with the source file. Vector artwork is the safest choice for logos, lettering, symbols, and line illustrations because it scales cleanly. Raster elements should be prepared at 300 DPI minimum at final print size, and accepted print formats commonly include JPG, PNG, SVG, PDF, and vector files. This artwork preparation guide covers the file-handling decisions that affect the final result.
Build the layout around the hardware
A full-bleed design should extend slightly beyond the visible rim line so small alignment shifts don’t expose an unwanted blank edge. The exact kick diameter still matters, whether the shell is 18, 20, 22, or 24 inches, so the artwork should be prepared for the chosen head size rather than stretched from an unrelated template.
The port hole deserves its own layer in the design file. A practical starting point is a 4- to 5-inch port, usually placed in the lower left or lower right of the resonant head. A 4-inch hole is commonly treated as the minimum for microphone access, while holes larger than 7 inches can make the drum behave much more like it has no resonant head. This port-hole guide explains the acoustic and practical trade-offs.
Keep the visual hierarchy blunt:
- Band name: Large, high-contrast, and clear of the pedal, mic, and lower hardware.
- Primary image: Above the main beater arc when the front head carries album art or illustration.
- Secondary text: Kept away from the strike zone and reduced to information that remains readable at distance.
- Fine outlines: Thickened enough to survive lighting, scaling, and the texture of the selected surface.
- Gradients: Simplified or tested carefully because subtle transitions can band or lose separation in print.
White artwork on a clear surface can look striking, but it depends on the printing setup and the head’s finish. A proof or live browser mockup is valuable because it exposes port placement, contrast, and cropping problems before the head reaches the stage.
The Front Resonant Head as Part of Your Brand
The front resonant head is the kit’s billboard. The batter side faces the drummer and takes the abuse, but the audience, venue photographer, and phone camera see the resonant head. Leaving it clear when the band has a strong visual identity wastes the most visible surface on the kit.
A printed resonant head doesn’t need the same impact resistance as a batter head, but it still has to survive real stage conditions. Cymbal stands swing into it, microphone booms pass across it, cases press against it, and foot pressure can damage an improperly handled head. A thinner resonant film usually gives the shell useful openness, while the artwork turns the bass drum into a consistent part of the band’s presentation.
Choose the port position before the artwork
A centered port gives the cleanest visual symmetry, but it can make microphone access less convenient. An offset port, usually lower left or lower right, gives a technician a more practical angle and can keep the microphone closer to the beater area. The design should be composed around that opening instead of treating it as a cut made after printing.
A port ring can make the opening look intentional. A felt ring helps protect the edge, while a printed circular element can disguise the cut and turn it into part of the logo system. The choice depends on whether the design favors symmetry, technical practicality, or a deliberately worn industrial look.
A strong front head should still look complete when the microphone is removed.
The graphic can reinforce the band’s identity, support merch recognition, and remain consistent through set changes more effectively than a fabric banner behind the kit. Bands that use a mark, mascot, symbol, or wordmark should establish one dominant element rather than filling every available inch. A useful adjacent branding reference is this Ludwig decal sticker page, especially for studying how a simple instrument mark can remain recognizable at a glance.
For logo-focused layouts, this guide to designing a custom bass drum head logo offers a practical direction. The final artwork should be sized for the actual shell, checked against hardware, and exported with the port location already represented.
Matching Your Head Choice to Live and Studio Use
Touring and studio work reward different compromises. A club kit needs a head that tolerates transport, hard hits, inconsistent rooms, and fast setup. A studio kit benefits from a response that reveals tuning changes and quieter detail, even if that means choosing a less aggressive construction than the one used on stage.
For live metal work, two-ply heads are the sensible tom choice when cut and durability matter. A controlled single-ply snare head can provide snap without making the drum feel excessively compressed, while the bass drum benefits from a reinforced batter design with built-in damping or a practical port. The front resonant head should carry the full-bleed artwork, with moderate tension that avoids unnecessary stress around the hoop and port.
A studio setup can use lighter batter and resonant choices when the room and microphones need more openness. A printed front head can be swapped between sessions, but the graphic earns its value at the gig, where lighting, distance, and camera angles test the design more severely than a controlled room.
| Drum | Live / Touring Spec | Studio Spec |
|---|---|---|
| Toms | Two-ply clear or coated construction for cut and resistance to heavy striking | Lighter construction for tuning sensitivity and more open detail |
| Snare | Controlled single-ply head for snap and focused response | Responsive head selected for the room, microphone, and desired crack |
| Bass drum batter | Reinforced construction with built-in damping or an EQ port | Lighter or less restricted option when more shell response is useful |
| Bass drum resonant | Printed head with planned port position and moderate tension | Printed or blank head selected around microphone placement and room tone |
Toms generally benefit from a slightly higher tuning than a broad rock setup when double-kick passages need separation. The snare should favor crack over excessive body, while the bass drum front should remain controlled enough for microphone access without turning the drum into a flat, lifeless surface. This bass drum tone guide provides useful context for balancing front-head tension, damping, and microphone response.
The market reflects the importance of this category. Independent research estimates the global drum heads market at about USD 500 million in 2024 and projects roughly USD 750 million by 2033, with a 5.5% CAGR from 2025 to 2033. The same report projects North America at about 35% of revenue in 2026, Asia Pacific at 30%, Europe at 20%, Latin America at 8%, and the Middle East and Africa at 7%. It also places metal batter heads at about 45% of total market revenue in 2026, with year-over-year growth of around 8%. The market report supports what metal players already see in practice, durable, controlled heads remain central to replacement decisions.
Custom Bass Drum Head lets bands upload logos, photos, gradients, illustrations, and fine line artwork in JPG, PNG, SVG, PDF, or vector formats, then review a live browser mockup before printing. Choose a front resonant or batter head from 16 to 32 inches, set the mic port position, and visit Custom Bass Drum Head to design a metal-ready head that matches the playing surface, stage layout, and band identity.